Showing posts with label cosplay. Show all posts

Tuesday, December 1, 2015

So you’re doing your first cosplay… - Rintare

You might be feeling self-conscious or scared about doing your first cosplay… It’s a big step to enter the world of cosplay and it can be a scary step to take! Luckily for you, there is so much out there for you to learn from. There tons and tons of blogs, videos, tutorials, and other cosplay community members out there just waiting to help you out! You are most definitely not going into it alone!

In my opinion, the most important thing about cosplay is exuding confidence!!! Even if you’re feeling uneasy now, when it’s the day of the convention, or photoshoot, or whatever it is, you better be the shining pinnacle of confidence! Confidence is key! I know it’s been said many times over, but if you are feeling self-conscious and down about yourself, it will show! After all, you should have nothing to feel bad about if you’ve done all this hard work slaving away for your cosplay. Even if you didn’t make your own cosplay, have confidence in the effort you put into hair, makeup, and whatever else you spent 3 hours watching YouTube videos for. Be proud!

Another way I think we cosplayers can exude confidence is by becoming the character! Do not let the costume wear YOU! You are that character for the day, so be freed from your concerns. On the day of the event (convention, photoshoot, etc.) make sure you are the best you can be! Your hair and makeup is on POINT! Your costume fits you like a glove and there isn’t a wrinkle in sight! If your cosplay has some flaws…rock it with confidence!!

Here are some more specific tips I think may help!

Costume
  • Gather references of your character/outfit. A lot!!
  •    Regardless of whether it’s bought or made, make sure it fits you and flatters your body shape!
  •  Make alterations where needed! Shorten a skirt, hem some pants, pull in a shirt, do what it takes to get the perfect fit!
  •  Remember…we are not cartoon characters with stick thin arms and legs with mile long torsos! 
  • As you’re planning out a cosplay expect to run into some proportion issues. Just adjust accordingly.
  • Don’t bite off more than you can chew! You should have adequate time and resources for the cosplay you want to do.
Hair
  •  It can be hard to match colors and styles for your character. Just do the best you can and sometimes that means putting a wig in your cart and praying it’s the right color!
  • Wig hair is not real hair and it needs to be treated as such! Learn everything you can about what you’re trying to accomplish. Even if you’re just trimming, make sure your cutting technique is the right one.
  •  Hairspray is your friend.


Makeup
  • Look at references or look to other cosplayers whose makeup you really like!
  • PRACTICE PRACTICE PRACTICE!!! There is nothing better to do!
  • Watch tons of videos! Technique is very important!
  • Don’t think you can get away with cheapy makeup, spend the money where it needs to be spent so your makeup doesn’t melt off of your face!
  • If someone else is doing your makeup, ask them to tell you about their process and why they’re doing whatever step they’re doing.


In short, take the time to learn your craft and the time you put into it will be the result you get out of it. You should always be learning and learning and learning and then MORE LEARNING!! Learn how to be the best you can be and then GET BETTER!! Be confident in what you’re doing! Radiate dat confidence and go out there and slaaay!!

Thank you for reading!

Monday, November 23, 2015

Super Easy Kotori Hair Loop Quick Tutorial (Love Live)


Hey everyone! This is Rintare with a reaalllyy quick tutorial on how to do Kotori's (Love Live) hair loop. I know a lot of people have trouble with this, so I just wanted to share my own take on it. I hope you find this helpful!
Here's the finished loop! Read on to see what I did!

So for starters, the Kotori wig I purchased came with a small ponytail clip to attach to the wig. I know not all wigs come like this, so sorry if this tutorial doesn't apply to you! The wig I purchased was from aliexpress: here

First, take out the ponytail clip, brush it out, make sure it's all nice, yadda yadda!


Next, take a small section of hair from the top layer of the ponytail. You want to make sure you're not taking too much hair or else you will begin to see the netting underneath. I took about an inch or so wide of a section.


Third, begin forming your loop by flipping this section of hair forward (so it's in front of the teeth of the clip)! Here's a side view of that:


Fourth, go ahead and clamp that section with the clip! You can clamp so the loop is a little smaller and pull the hair up to your desired length. Spread the hair out at the top so it looks loopy!


Next, you might want to secure the loop with a hair tie so it stays! (I didn't do that yet because I plan on fixing up my whole wig later on). Somewhere around where my thumb is should be perfect!


Finally, HAIRSPRAY IT. Use the best hairspray you can find! The kind that freezes the hair in place. I find that Pantene Pro-V 24 Hour Volume Hairspray works well for me. A lot of people are a fan of got2b freeze spray as well.

Tada! All ready to be attached to your wig base.
You are now ready to clip your ponytail clip and loop onto the main wig base. Be careful not to let your loops fall out of the teeth in the process! I clip it onto a section of hair that I gathered previously. On the wig base, it's basically a side-half-ponytail and I just clip right over where I tied that section. Here's a reference that may help:


I also find that many wigs are styled so that Kotori's loop is also what makes her ahoge (the little tuft of hair on top of her head). I don't think this is the case after thoroughly researching it for myself! To style the ahoge I just grabbed a little piece of hair from the top of the wig and teased it. I hope this tutorial was clear, easy, and helpful!! Have fun styling, little birds!


Thursday, July 2, 2015

Shiro's Crown Tutorial (No Game No Life)

Sup! Rintare in da building. So, I said I was going to share the process behind my Shiro crown that I made for Katsucon 2015 and here it is! I really wanted my Shiro to resemble the figure more so than the anime, so I pulled my references for the crown from the figure.I guess I'll try to make this as tutorial-y as I can. Sorry in advance for lack of pictures as I didn't capture every single step of this!

Stuff I used:

  • Craft foam (I just used a few yellow sheets from Michaels, but I painted over them anyway so it doesn't really matter!)
  • Xacto knife or something to cut with precision
  • Spray paint + primer
  • Wire (I'm not too sure about the specifics of the wire, but it is slightly thicker than a wire clothes hanger?)
  • Gems!!
  • Craft adhesive of your choice (I used a hot glue gun)
  • Aligator clips for putting the crown in your hair!
 So first I made a paper mock-up after Kuritare did some dimensional analysis on the figure to match the size to me. Despite all the number crunching, I still needed some adjustments because well...I'm not an anime figure and I'm much taller than Shiro. I made...a lot of paper mock-ups before I was satisfied with all the angles. The structure is strange because the crown is not a complete circle. Shiro and Sora apparently break a crown in half,  but this crown is really far from being a half circle. It appears to be about 7/8th of a circle, just enough room for a ponytail to fit through.
After tracing the mock-up onto the foam, I drew the mock-up again with the decorative ridges (? I guess I'll call it that).
The crown is made up of 7 pieces.
I laid my mock-up on top of the foam to trace!
The decorative piece was cut out separately from the 7 crown parts.
It was one continuous and very narrow piece of foam,
so the tips of the crown where VERY fragile.
So, in total I had 9 pieces of foam: the 7 pieces, the long, skinny, and fragile decorative piece which also helps to hide the separation between the 7 main pieces, and a backing piece which I used to glue the main 7 pieces onto (so they have something to align to) which is not pictured, but you'll see it later.
Here's a tiny mock foam crown I made to test.
I'm like a fairy god parent!
Next, I painted all my pieces! First, I went over each piece with spray paint primer (it's white). I think this also helped fill in the porous foam as well to make the crown look smoother. Primer and two coats of gold did the trick.
A quick paint test on a foam strip. This is two coats after primer! 
Liquid gold *v* Also this is the paint I used! Shiny gold cap!
Here is everything all painted and laid out!
Ready for assembly!
 Now I just glued and glued and glued! Below you'll find the picture of a main crown piece as I glue it to the backing piece. I decided to use two pieces of wire because I didn't want the crown pieces to be teetering on one piece of wire. So, I glued the wire to the backing and then glued the pieces on. Finally, I glued the decorative piece on. I then CAREFULLY bent the whole crown into the right shape. It was very scary.

A glimpse of the backing piece and the wires.
PHEW!!
The ponytail clip for the wig fit perfectly in the gap.

 Great! Next, I had to pick out the right gems for the job! Luckily, my big bag of gems from Michaels had all the large gems I needed and Lili gave me some small oval gems as well. Because I used premade gems, I obviously wasn't going to be accurate, but I think they did the job just fine. Making your own gems can be expensive and time consuming!

BAG-O-GEMS (spilled out on my desk)
Tada! all gems glued on.
Here's a sample of how I attached alligator clips.
I used 2 for the finished crown.
Our friend Shifty Cosplay also asked me to make him a Sora crown. The process was similar except I just made it one huge piece of foam. There's a back piece and wire as well.
The gems were pretty off for this, but..eh.

Crown debut in our Katsu hotel room!
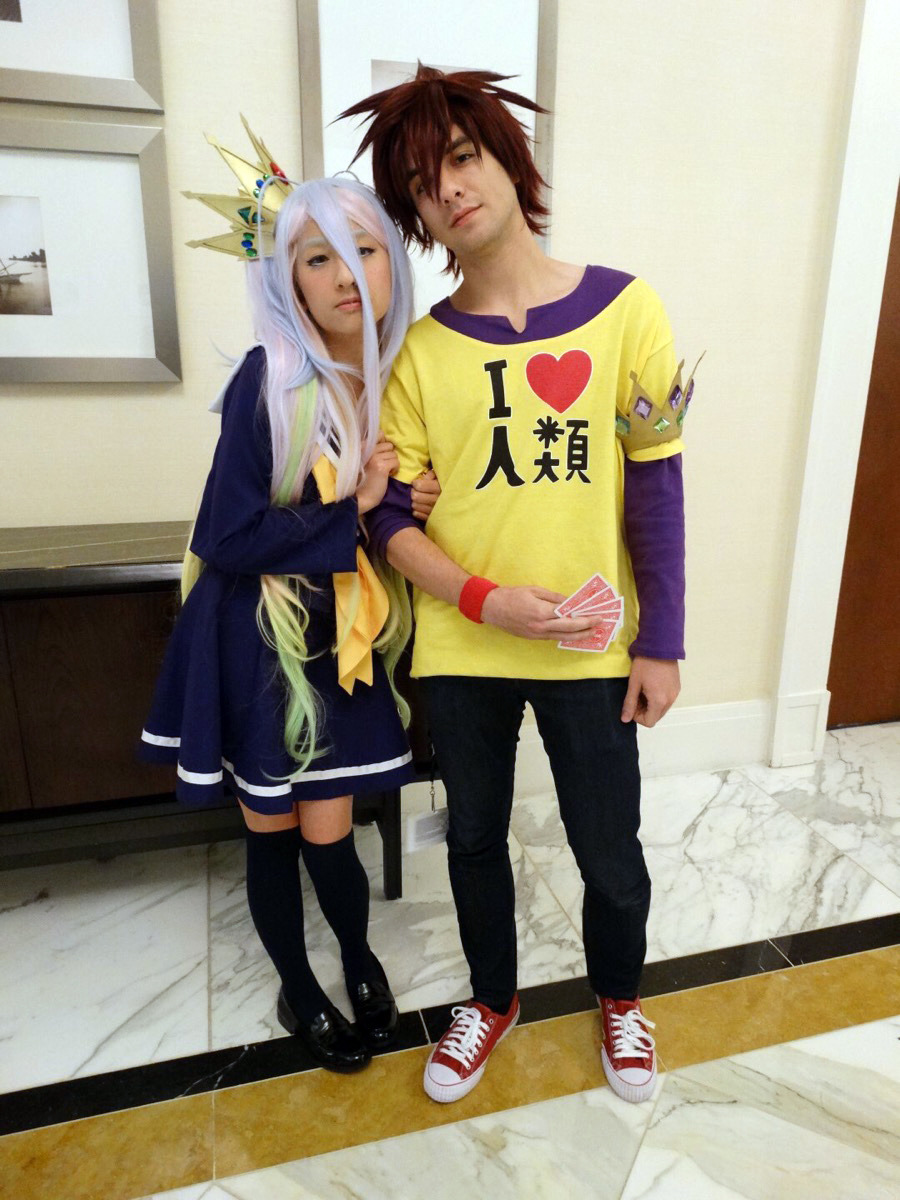
A hall shot of  Shifty Cosplay and I. 
Thanks for reading! I hope you found this at least somewhat helpful! I would be happy to answer any questions about it too. (= 3=)

pce

Monday, June 29, 2015

My First Cosplay Prop: Amon's Blade (Magi: Kingdom of Magic)


As a kid I always had some chuunibyou. Well, just the part where I pretended to have special powers and imagined various objects as weapons of dark energy or something. So yes, my imagination ran rampant as I was young. It was always awesome to have some kind of wooden sword to swing around. Finally in my first year of college I decided I had the money and time to make my own awesome toys. Originally I saw a video on how to make a simple wooden sword. This looked like a lot of fun and applicable to what I wanted. Although Amon's sword is a curved blade, the beveling (slanted edges) part of the video gave me ideas.

So here I will run you through the process and a couple of WIP (Works in Progress). If you don't care for all that, the final product will be at the bottom.


--------


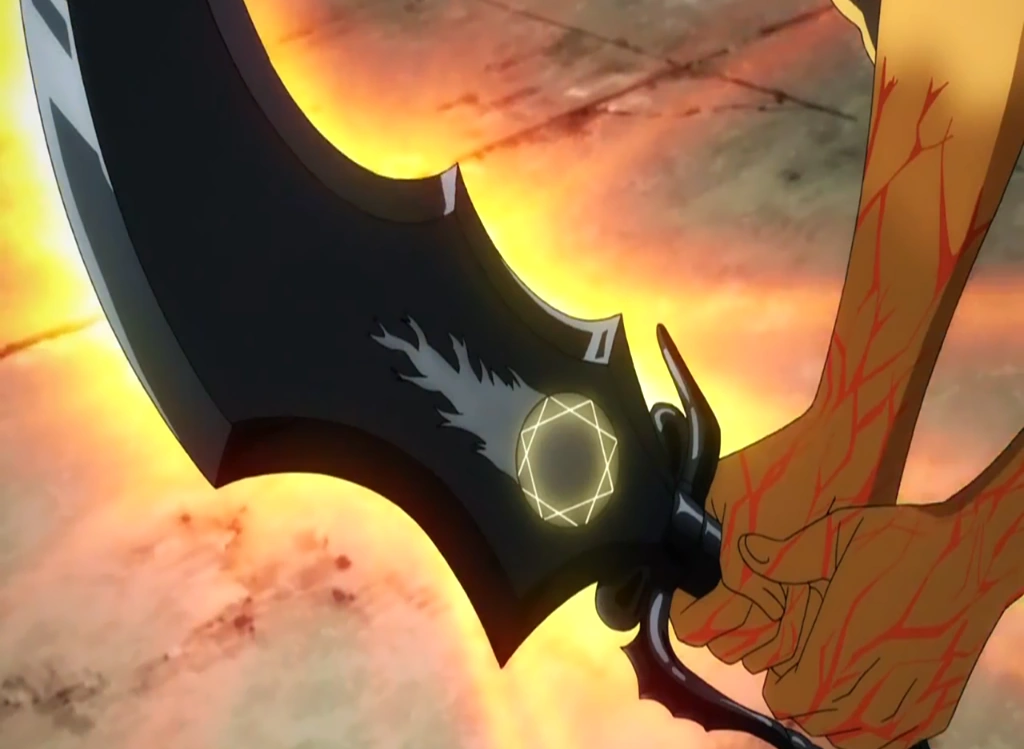
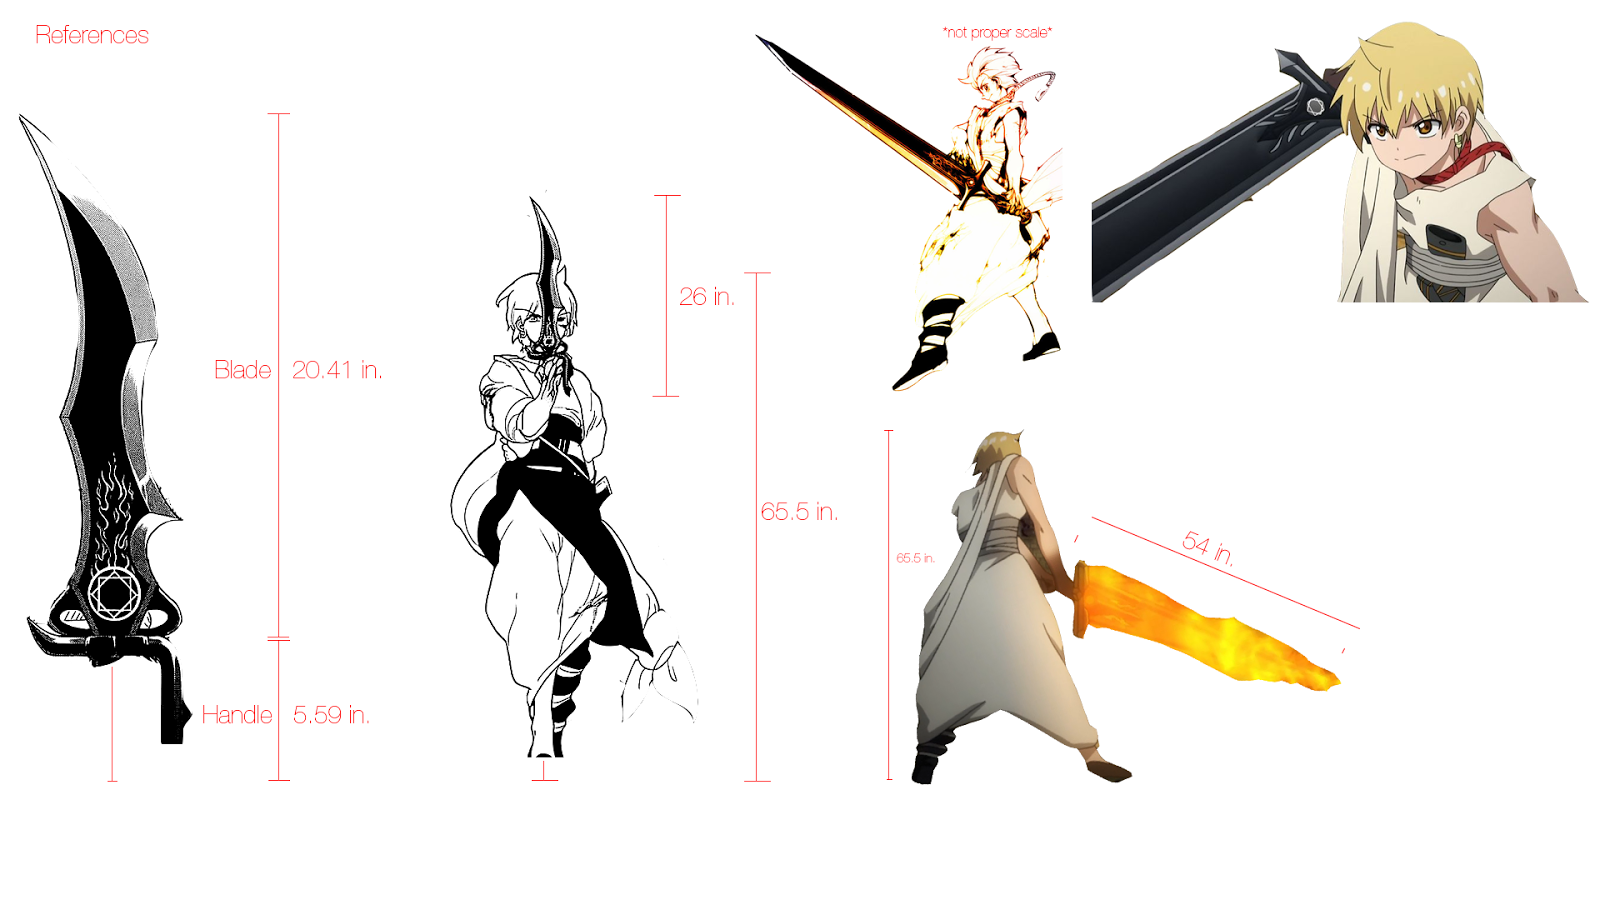
So first step was to figure out its dimensions. I put a lot of work into finding the right model I wanted. The picture above is actualyl one I never looked at as the anime and manga have variations. I decided on the smaller sword, as many people were telling me that making the large sword out of wood would be too heavy. However, at this point I don't think it would be too bad for me. I decided on the smaller one, and was going to make it to scale for Alibaba. Lucky for me, he and I are actually the same height so calculations were precise. I had a lot of trouble finding a perfect picture with the handle, so I guessed the size on my own.

The calculations became very hectic because I had no idea where to put what. I started to create points of where the arcing began and measured their distances so I could use a protractor to plot specific points.

I took all the calculations on the left and transferred it to some super heavy duty cardboard. This was a huge mistake because it took me forever to cut out. But that chuunibyou got me and when it came out I was swinging it around like a little kid. It would be much more beneficial to me to trace and cut it out on perhaps some solid construction paper since I was just going to trace it on to some wood.

The next step was transferring it all to a piece of wood. I went out and bought some pine wood, which is pretty solid, and traced the design onto it. The piece I got was very cheap, about $3 and probably had enough wood to make 3 swords.


This was the piece all cut out, with the hilt very long so that I had extra space to clean it up later. I used a jigsaw to cut out the shape accurately. Next was to put the details on it. So for the bevels I used a hand sander that I tied down to a bench and went away, kind of like in the video. It was pretty easy to get the edges lined up, except for the part with very sharp turns (bottom front). Because of this, the sword is a little sloppy there.


So the first picture here shows the edges done on it. I applied a little too much pressure on the hilt and it broke, so I just put a nail through the handle and attached them again. I then sanded it smoother and shaped the handle appropriately. I applied about 3 coats of black spray paint and let it dry for a long time. The rings at the bottom of the blade were tough and turned out not smooth. I had to hand file them down after cutting appropriate sized holes.

Finally after it was pretty much done, I smoothed it a little more, and Lilitare helped me apply the white decals on the front. Originally I thought a stencil would do the trick but I was struggling trying to make the right stencil.

--------

And finally the final product!

It went through a bit of damage during the con (drunken swinging) but it survived and looked pretty good for my first prop. It now hangs proudly over my bedside. I know the process was lengthy and maybe a bit boring to read if you did read it.

Thanks for reading everyone!


Sunday, June 28, 2015

My First Cosplay: Shiro (No Game No Life) - Rintare


As you may or may not know, in taretaretare, I am the one with the least cosplay experience! I only started cosplaying in 2014 at Otakon. I decided to cosplay Shiro from No Game No Life because I was watching the series and I really loved her and I thought her outfit would be simple enough to do. I asked my aunt to help me because she's a wonderful seamstress. As I'm learning more about sewing, I look back at my Shiro costume in awe because of how beautiful her work is *0* She made the whole thing! I really wanted to help, but I didn't really know anything....

Here I am! I think this was taken by Kuri in the hotel hallway.
A hall shot in better lighting
Here's the whole outfit on the hanger


So I'll walk you guys through her process!
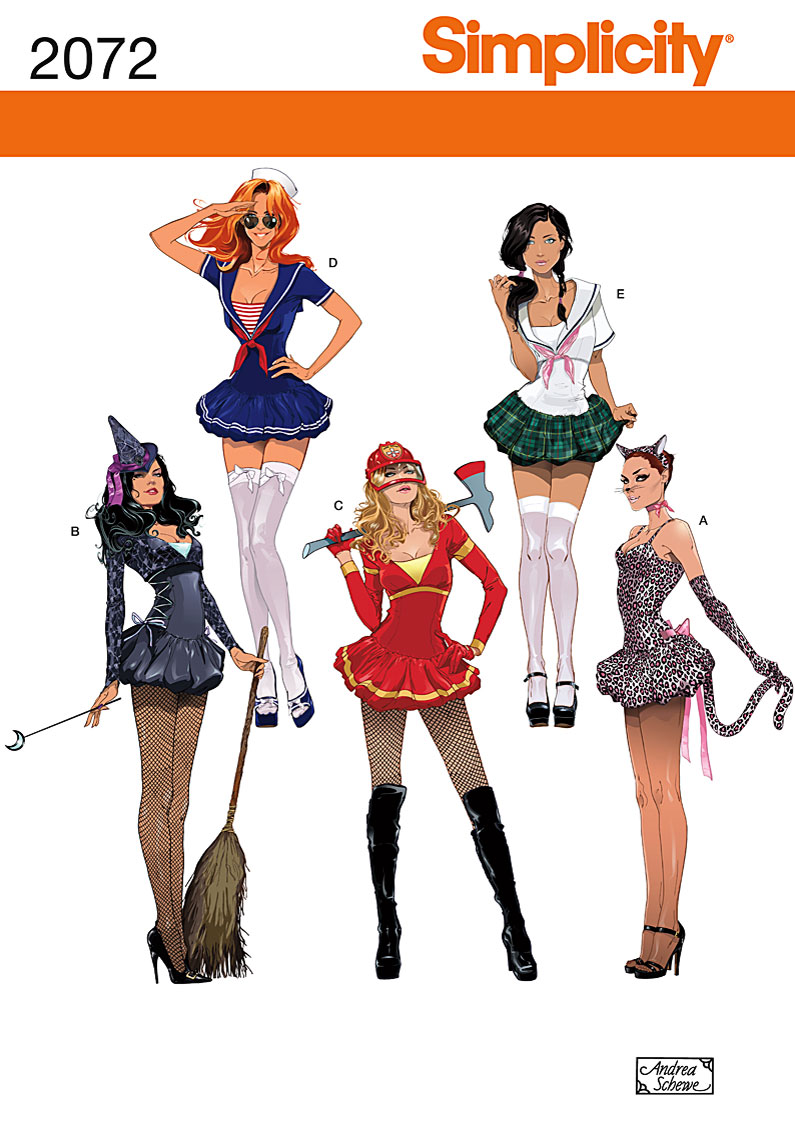
The outfit is a simple dress underneath of a jacket. She used Simplicity 2072 to help her with the sailor collar! All the stripes you see are just different ribbons. The yellow scarf is two separate pieces of fabric that are attached at the shoulders. The small clasp (with the white button) holds the scarf together. I think this is supposed to be just a band?? but mine is attached to the jacket to help keep structure as well.
I got the wig from aliexpress and it was pretty cheap. It got really tangled really quickly...I had to throw it away after the con because it was too crazy. I didn't really style this wig because I didn't think I needed to, oh well!

I had a lot of fun with makeup! I had never done cosplay makeup before so I had quite the adventure figuring out how to cover my eyebrows.

This was a really special cosplay! So many people took pictures of me and it was really overwhelming for a first con. It really makes you feel on top of the world and it's probably why I decided I wanted to cosplay again and again.

I redid this cosplay again for Katsucon 2015 where I bought black loafers, made a crown (my first cosplay project!), and bought a beautiful new wig! I really want to talk about how I made the crown, so I'll get to that in another post!


Let me know if you have any questions about this cosplay or if you have any advice on what else I could talk about!

Until next time!